How to exchange token from an external provider to a keycloak token
This post is about a "token exchange" operation on an openid connect server. The example is done with keycloak v4.8. We'll explain how it works and when you'll need it.
Use case
Let's begin with a simple example. This is a Cordova application, from the redhat example : https://github.com/keycloak/keycloak/tree/master/examples/cordova
            <html>
            <head>
                <title>Authentication Example</title>
                <script type="text/javascript" charset="utf-8" src="cordova.js"></script>
                <script type="text/javascript" charset="utf-8" src="https://app.please-open.it/auth/js/keycloak.js"></script>
                <script type="text/javascript" charset="utf-8">
                    var keycloak = new Keycloak();
                    var keycloak = Keycloak({
                        url: 'https://app.please-open.it/auth',
                        realm: 'example',
                        clientId: 'example_client',
                        scope: 'void',
                        flow: 'hybrid'
                    });
                    keycloak.onAuthSuccess = updateState;
                    keycloak.onAuthRefreshSuccess = updateState;
                    keycloak.onAuthLogout = updateState;
                    function updateState() {
                        if (keycloak.authenticated) {
                            document.getElementById('authenticated').style.display = 'block';
                            document.getElementById('not-authenticated').style.display = 'none';
                            document.getElementById('username').innerText = keycloak.idTokenParsed.preferred_username;
                            document.getElementById('idToken').innerText = JSON.stringify(keycloak.idTokenParsed, null, '  ');
                        } else {
                            document.getElementById('authenticated').style.display = 'none';
                            document.getElementById('not-authenticated').style.display = 'block';
                        }
                    }
                    function error() {
                        document.getElementById('authenticated').style.display = 'none';
                        document.getElementById('not-authenticated').style.display = 'block';
                        document.getElementById('error').innerText = 'Failed to initialize Keycloak adapter';
                    }
                    document.addEventListener("deviceready", function() {
                        keycloak.init({ onLoad: "check-sso" }).success(updateState).error(error);
                    }, false);
                </script>
            </head>
            <body>
            <div id="authenticated" style="display: none;">
                <div>
                    <button onclick="keycloak.logout()">Log out</button>
                    <button onclick="keycloak.updateToken()">Refresh token</button>
                    <button onclick="keycloak.updateToken(9999)">Force Refresh token</button>
                    <button onclick="keycloak.accountManagement()">Manage account</button>
                </div>
                <div>
                    <table>
                        <tr class="odd">
                            <td>Username</td>
                            <td id="username"></td>
                        </tr>
                        <tr class="odd">
                            <td>ID Token</td>
                            <td><pre id="idToken"></pre></td>
                        </tr>
                    </table>
                </div>
            </div>
            <div id="not-authenticated" style="display: none;">
                <div>
                    <button onclick="keycloak.login()">Log in</button>
                </div>
                <div>
                    <p id="error">Not authenticated</p>
                </div>
            </div>
            </body>
            </html>
You will need inappbrowser plugin in your app.
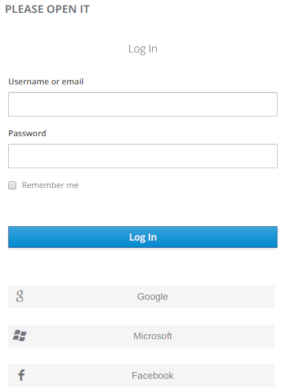
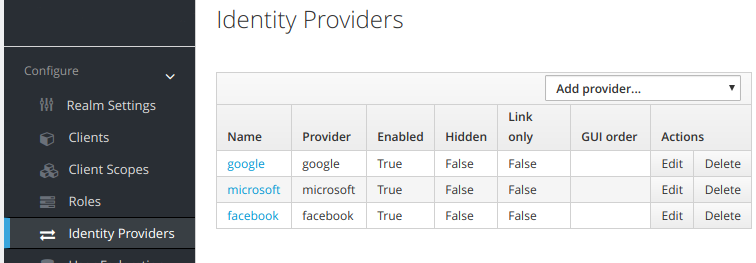
As you can see, the login form loads perfectly and you can log in your application.Now add some external providers in your keycloak.
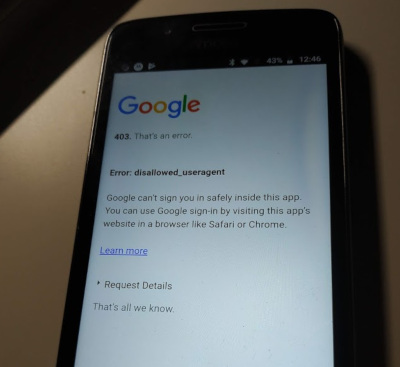
New buttons appears to log in with your new providers. The login form still looks great and working with a keycloak account. Now click on Google and it fails :
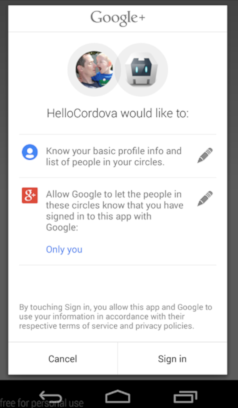
There is another limitation. The app can not interact with local registered Google accounts. Sometimes people do not remember their password, and can not login in a web browser.
A plugin such as "Google+ login" in Cordova do it : https://github.com/EddyVerbruggen/cordova-plugin-googleplus
Token exchange ... super token transformation !
Now you have an id_token from Google, using a standard "Google button" in your app instead of Keycloak login form.
But the goal of adding an external provider to keycloak is to delegate all authentication. Your app doesn't know if the user logged in with a Google account or an internal account from your keycloak instance.
So, what is token-exchange ? https://tools.ietf.org/html/draft-ietf-oauth-token-exchange-16
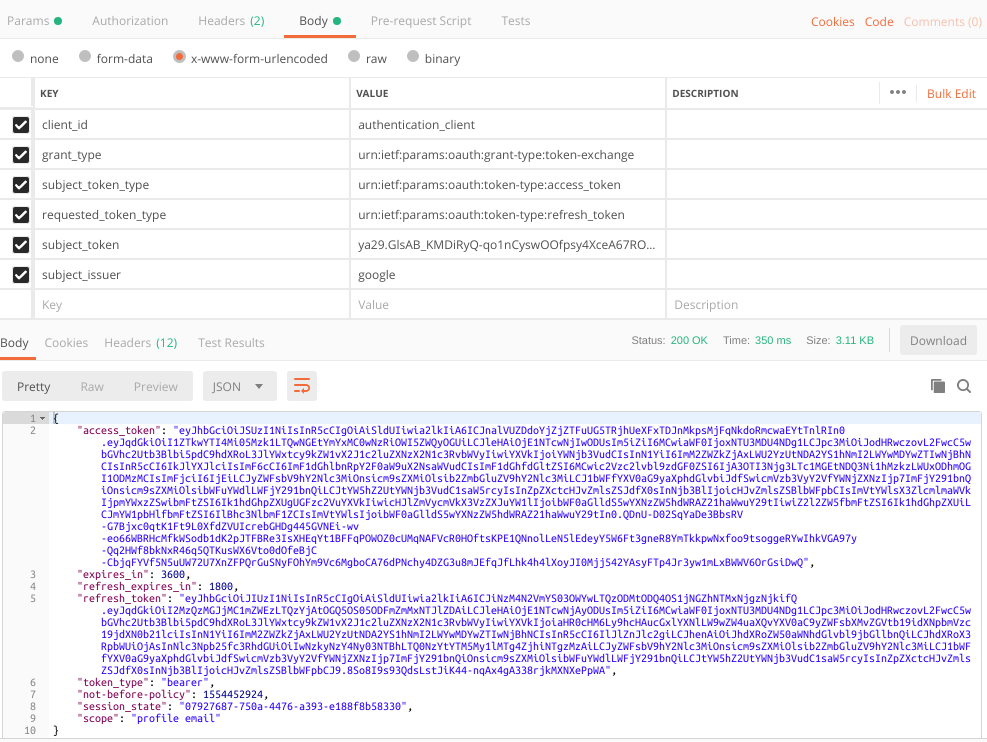
In a short version (for our example) : I post an id_token from Google to my keycloak instance and keycloak gives me a token, refresh_token (and all you need) and log in the user on the keycloak server. Magical ? Not at all.
Server configuration
As mentionned at ietf.org, token-exchange is still a "draft". So we had to enable it in keycloak by hand.
https://www.keycloak.org/docs/latest/securing_apps/index.html#_token-exchange
Add 2 parameters in your startup command line (depending of how you do it)
        -Dkeycloak.profile=preview
        -Dkeycloak.profile.feature.token_exchange=enabled
Now a new option is available in the identity provider : token-exchange
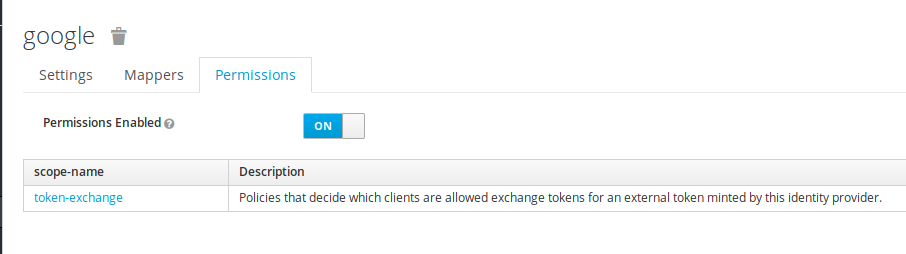
Next, follow the keycloak documentation :
- Add a policy to the "token-exchange" provider permission, to the client used for authentication
- Add this previous policy to the "token-exchange" client permission
Request a token-exchange
Now, you have a Google token_id and you want a keycloak token (also authenticate the user on your keycloak).
            curl -X POST \
            -d "client_id=authentication-client" \
            -d "client_secret=client-secret" \
            --data-urlencode "grant_type=urn:ietf:params:oauth:grant-type:token-exchange" \
            -d "subject_token=googleTokenId" \
            -d "subject_issuer=google" \
            --data-urlencode "subject_token_type=urn:ietf:params:oauth:token-type:access_token" \
            -d "audience=target-client" \
            https://mykeycloak-instance/auth/realms/myrealm/protocol/openid-connect/token
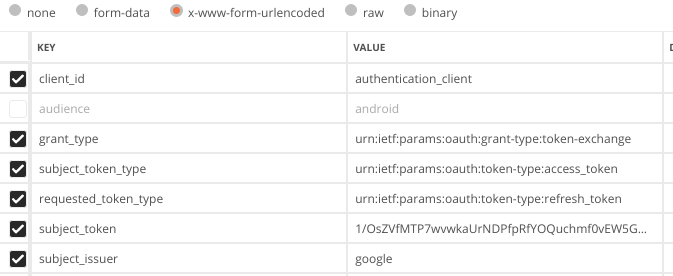
To test it, go to oauth playground from Google (https://developers.google.com/oauthplayground) and obtain a new token. copy/paste it to your postman request and that's it !
In our mobile app :
            function loginToPleaseOpenIt(accountName, callback){

            var token = JSON.parse(storage.getItem(accountName)).access_token;

            var settings = {

                async: true,

                crossDomain: true,

                url: "https://app.please-open.it/auth/realms/demo_business_customer/protocol/openid-connect/token",

                method: "POST",

                headers: {

                "Content-Type": "application/x-www-form-urlencoded",

                },

                data: {

                client_id: "authentication_client",

                grant_type: "urn:ietf:params:oauth:grant-type:token-exchange",

                subject_token_type: "urn:ietf:params:oauth:token-type:access_token",

                requested_token_type: "urn:ietf:params:oauth:token-type:refresh_token",

                subject_token: token,

                subject_issuer: "google"

                }

            }