My smartphone as a shortcut helper - enhanced version

Purpose
Remember, a year ago we published a POC and a reflexion around keyboard shortcuts and touchscreen. The result was a heavy C# application, only for validation. After several monthes using it, we thought we have to write a better version. Of course, we did it with python script. Let's take a look.
Concept
A software installed on the computer hosts a webapp. This server has APIs which returns current window context, and another for keyboard shortcuts.
The webapp is notified when something changed and load an appropriate plugin, depending on the context.
Get active window title and process
It works only on Windows for now. We use the same Win32 apis :
            import win32gui
            import win32process

            tempWindowName=win32gui.GetWindowText (win32gui.GetForegroundWindow())
            threadpid, procpid = win32process.GetWindowThreadProcessId (win32gui.GetForegroundWindow())
            p = psutil.Process(procpid)
            print(p.name())
It returns 2 components : a window title, and the process name behind the window. put them in a json structure :
            {
                \"process\": \""+p.name()+"\",
                \"windowName\": \" "+tempWindowName+"\"
            }
Websockets
Window context is sent with websockets. It provides instant notifications, with a low network usage.
            import websockets
            import asyncio

            start_server = websockets.serve(pub_sub, '0.0.0.0', 5678)
            asyncio.get_event_loop().run_until_complete(start_server)
            asyncio.get_event_loop().run_forever()

            connected = set()

            async def pub_sub(websocket, path):
                global connected
                # authorize only one client
                if len(connected) == 1:
                    return
                connected.add(websocket)
                try:
                    while True:
                        # send data
                        await asyncio.sleep(0.5)
                finally:
                    connected.remove(websocket)
Beside the javascript client code (thanks to Stackoverflow) :
                var loc = window.location, new_uri;
                if (loc.protocol === "https:") {
                    new_uri = "wss:";
                } else {
                    new_uri = "ws:";
                }
                new_uri += "//" + loc.host;
                new_uri += loc.pathname + "/process";

                var processSocket = new WebSocket(new_uri);
                processSocket.onmessage = function (evt)
                {
                    var receivedMessage = JSON.parse(evt.data);
                }
Plugins
Plugins are simple responsive webpages, built with Bootstrap. The plugin name (and directory) is the process name.
                <body>
                <div class="container" id="mainPage">
                </div>
                </body>
The window title is now in a parameter, I think we can do it better.
            function loadPlugin(pluginName, windowName){
                $( "#mainPage" ).load( "plugins/"+pluginName+"/index.html?windowName="+encodeURI(windowName), function() {
                    });
            }
With a simple webserver, all is working :
            from flask import Flask, send_from_directory

            @app.route('/static/')
            def send_js(path):
                return send_from_directory('static', path)

            app.run(host='0.0.0.0', port=5555, debug=False)
We developped simple plugins, with only buttons and glyphicons :
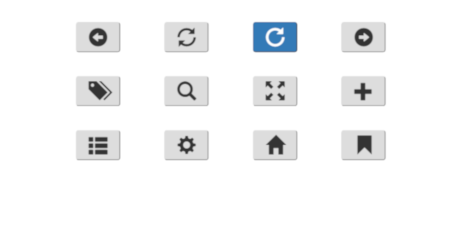
Chrome
File explorer

VLC
Keystroke API
Python has a fantastic library which simulate keyboard events : https://pypi.org/project/keyboard/. Note that you do not have to deal with a hudge list of constants, write keys events directly in a string :
            import keyboard
            from flask import Flask, request, abort

            @app.route('/keys', methods=['POST'])
            def sendKeys():
            try:
                keys = request.json['keys']
            except Exception as e:
                print ("exception while decoding")
                return abort(500)
            keyboard.press_and_release(keys)
            return "ok"
            function sendCodes(codes){
                $.ajax({
                    type: "POST",
                    url: "/keys",
                    data: JSON.stringify({"keys": codes}),
                    contentType: "application/json"
                    });
            }
            sendCodes("ctrl+a");
That's so simple !
Limitations
Now, all is working, all over your network. It means that every one can type everything he want on your computer. We need to build some limitations.
Ip filter
During the first connection, we keep the client ip address and limit all others request to this ip :
            @app.before_request
            def limit_remote_addr():
                global remoteAddr
                if remoteAddr != None and request.remote_addr != remoteAddr:
                abort(403)
First connection
The first time you open the app, we generate a simple uuid. This uuid is a key for first request. We build an URI with the host ip address, the uuid and put it in a QRCode. With your mobile device, scan this QRCode and you will get a redirection launching the interface. Easy ?
            def generateQRCode():
                global remoteAddr
                global globalUuid
                remoteAddr = None
                s = socket.socket(socket.AF_INET, socket.SOCK_DGRAM)
                s.connect(("8.8.8.8", 80))
                ip = s.getsockname()[0]
                s.close()
                globalUuid = str(uuid.uuid1())
                img = qrcode.make("http://"+ip+":5555/ping?id="+globalUuid)
                img.show()
Sources
Checkout the full version : https://github.com/mathieupassenaud/shortcuthelper